For some time now, I’ve become fascinated of modeling abandoned, derelict automobiles. After trying it out a couple of times, it was only obvious that I would do it on a military vehicle. Building a destroyed Panzer IV ausf J gave me a great opportunity to put my patience to the test because building tanks is otherwise usually a pretty straight forward process. Usually you “get to see” results pretty quickly and you can paint and weather the model in very few subassemblies, sometimes even as a complete model. Very different from assembling airplane models, where you first have to assemble and pre-paint cockpit, wheel wells, landing gears and bomb bays and then stuff’em inside the fuselage halves, attach wings and etc, etc, etc. It takes a decade before you finally recognize what you’re actually building.
In this case I spent a good time gathering information and the different parts to do a complete tank interior, even if it’s a destroyed one.I quickly realized that I would have to be able to break it apart as far as I could to allow detail painting and weathering before glueing it all up.
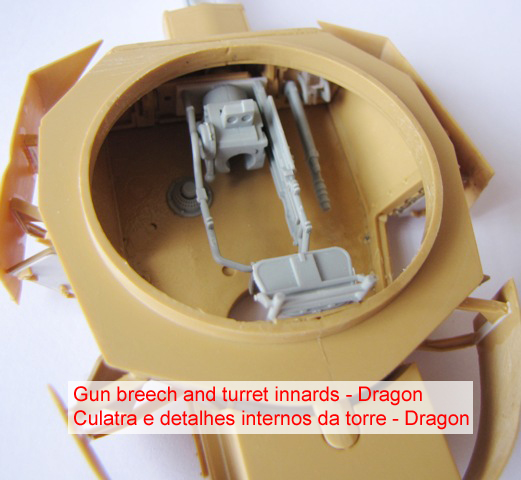
The model is a Frankenstein between a leftover Panzer IV chassis from Dragon and an early ausf J from Tamiya. In terms of quality and accuracy they’re not up to par with the recent Dragon offerings. Nevertheless I found the parts ok for what I had in mind. The innards came from different Trumpeter models as well as Dragons Panzer IV ausf G. I also added a lonely aluminum barrel from Jordi Rubio and a pair of Dragon late style link-by-link tracks to complete the package.
In this first post you’ll find pictures of all major assemblies with comments wherever I found them useful.
Ja faz algum tempo que tenho me dedicado a modelar Automoveis abandonados. Depois de experimentar um pouco, ficou obvio que iria aplicar o que aprendi num veículo militar. Montar esse Panzer IV ausf J destruído me deu uma ótima oportunidade de colocar a minha paciência á prova, uma vez que montar tanques da maneira tradicional é um processo bastante “pra frente” e corriqueiro. Normalmente é possível enxergar o resultado em pouco tempo e é possível pintar e envelhecer o modelo geralmente em poucos subconjuntos de peças montadas, e às vezes ate como modelo completo. É bem diferente de montar um avião onde é preciso montar, pintar e envelhecer separadamente um monte de subconjuntos como cockpit, trem de pouso, baia de bombas etc, que precisam ser espremidos dentro de uma fuselagem, para depois colocar as asas e ... etc, etc, etc. Ou seja: Leva uma década pra ver onde você vai chegar no final.
Aqui de cara levei um tempo ate juntar fotos e referencias e as peças necessárias para montar um interno de tanque completo, mesmo que no fim fosse um tanque destruído. Para garantir que eu pudesse tranquilamente pintar e envelhecer cada pedaço do modelo tive que planejar os conjuntos de peças de modo modular para que pudesse juntar e fechar o modelo no final.
O modelo é um Frankenstein feito a partir de um chassi de Panzer IV antigo da Dragon, e o resto dum antigo Panzer IV ausf J da Tamiya. No que tange precisão estes dois não conseguem mais competir com os novos kits da Dragon. Ainda assim as peças me pareceram adequadas para o que eu tinha em mente. As entranhas vieram de kits diferentes de Panzer IV da Trumpeter e da Dragon. Também adicionei um tubo de canhão em alumínio e um par de esteiras link-by-link da Dragon para completar o conjunto.
Nessa primeira parte vocês acharão principalmente fotos da montagem do modelo com comentários onde achei de utilidade.


